Installation

PowerTools can be added to your environment from AppExchange by an administrator. The app package creates a new action category called “PowerTools, a set of Apex classes, a named credential and a custom object that includes picklist value fields for use in Flow.


Setup

The setup process is as follows:

1. Register

Browse to the Apptigent user portal at https://portal.apptigent.com. Click the Create an Account link in the upper right then follow the steps. Once you receive a confirmation email and have completed the verification step, login and select My Organization from the drop-down menu next to your user name.

Click the Billing tab, fill out the credit card information and save your changes. If you are unable to provide a card, open a support case by clicking on the Support link in the top menu and a support engineer will work with you to set up alternate billing arrangements (skip the following steps #2 and #3 as Customer Support will need to generate an app and subscription for you).  

2. Create an App

After updating the organization billing details, select Apps from the top menu, then click the Create new app button and give it a title. None of the other fields are required, they can be left blank. Click Submit when finished.

When the app creation process has finished, the Client ID value will be displayed under Credentials. Click the Show button and copy this value as it will be needed in your Salesforce environment.

3. Subscribe to a Plan

Click on API Products in the top menu then select PowerTools for Salesforce. Select the desired plan, click the Subscribe button, then select the name of the app created in the previous step. Click Subscribe to finish.

4. Update Credentials

In your Salesforce environment, go to Setup and enter “Named Credentials” in the Quick Find field. Locate the “Apptigent_PowerTools” credential, click Edit, then paste the Client ID value from the Apptigent Customer Portal app you created previously into the Password field (if you need to get the Client ID value again, log back into the customer portal, navigate to your app and click Show). Save the password change to complete setup.

You can now use PowerTools in Process Builder and Visual Flow by selecting the PowerTools action category.

[NOTE: You will need sufficient permissions in Salesforce to complete this step, contact your administrator if you require assistance]

Watch the following video for a complete walkthrough of the billing, app creation and subscription process: 

Documentation

You can find interactive  documentation for all PowerTools actions on the Customer Portal by selecting API Products from the top menu, clicking on PowerTools for Salesforce, then selecting the “PowerTools Salesforce” API from the left navigation menu. 

All the available operations are listed on the left. Descriptions of input and output parameters are in the middle panel. The right panel contains the interactive testing tool, where you can see examples for each action and perform live tests in the browser (be sure to select the name of your app before invoking each  action as the tool requires a valid Client ID). 


Input Values

Many actions have very simple inputs, such as a number, string of text or collection of values; however, some are a bit more advanced and require additional configuration values. Salesforce Visual Flow and Process Builder do not currently allow picklist (drop-down) controls directly in Apex invocable method configuration dialogs. When an action requires a specific input, such as a “True” or “False” value or  currency abbreviation, for example, only a text field is displayed in the  configuration screen, meaning the user must supply the appropriate value by typing it in or referencing a variable. To find out what input values are accepted by PowerTools, locate the Action (such as “POST /ConvertCurrency”) in the interactive documentation, the click the link in the Parameters section. This will navigate to the input definition section and show all the possible values for the specified input.

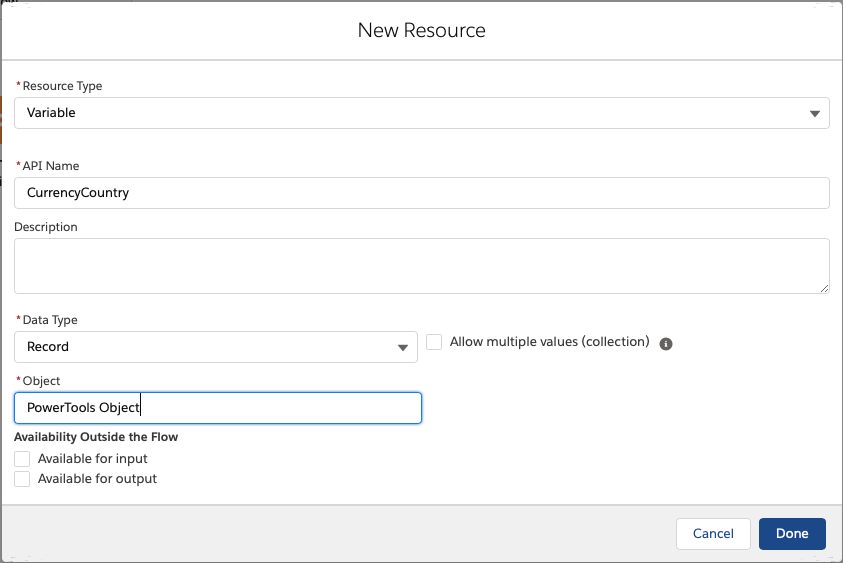
We understand that looking these up each time can be a bit cumbersome, so until such a time as Salesforce supports configuration dialog picklists, we’ve done the next best thing by creating a custom object that includes all the required picklist value fields. You can find it in the Object Manager under Setup. Look for the PowerTools Object (API Name: Apptigent__PowerTools_Objects__c) and go to the Fields & Relationships details to see a complete list. To use this object in a flow, create a new variable of type “Record” and select “PowerTools Object” as the record type, like so:

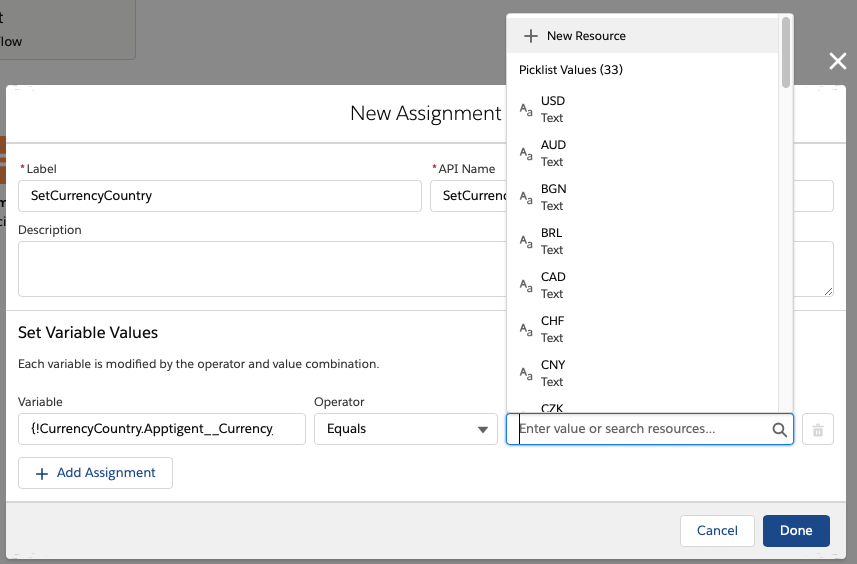
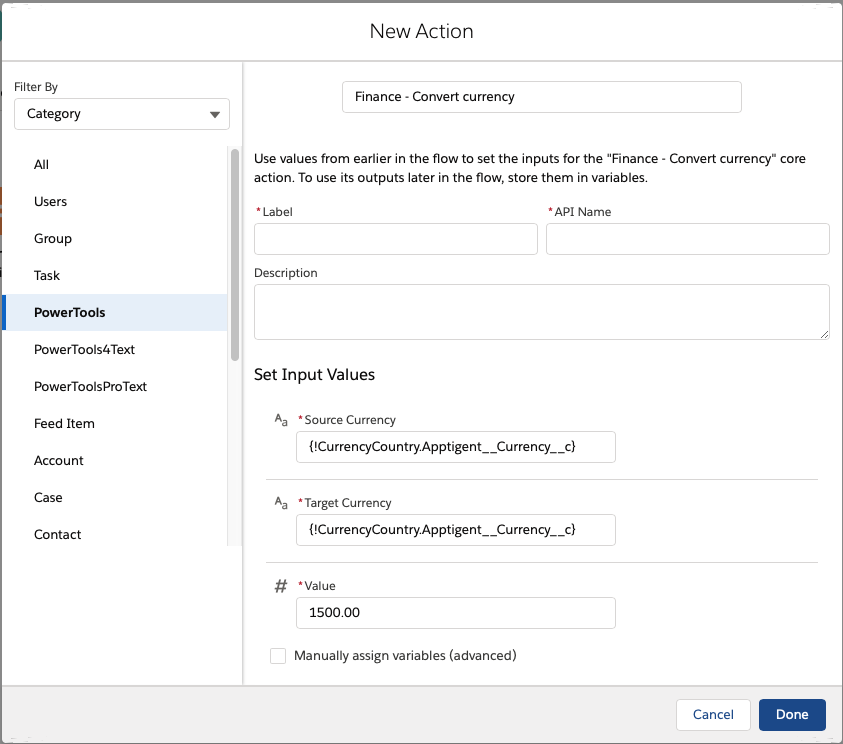
Next, add an Assignment, select the variable name, then choose the Apptigent__Currency field. Clicking in the Value field of the dialog will then show all of the available input values; select one to assign it as the variable value, which can then be used in the Source or Target fields of the PowerTools Convert Currency action:

..