You will be charged % cancellation fee
|
|
Please Choose |
| Full Order Select Items |
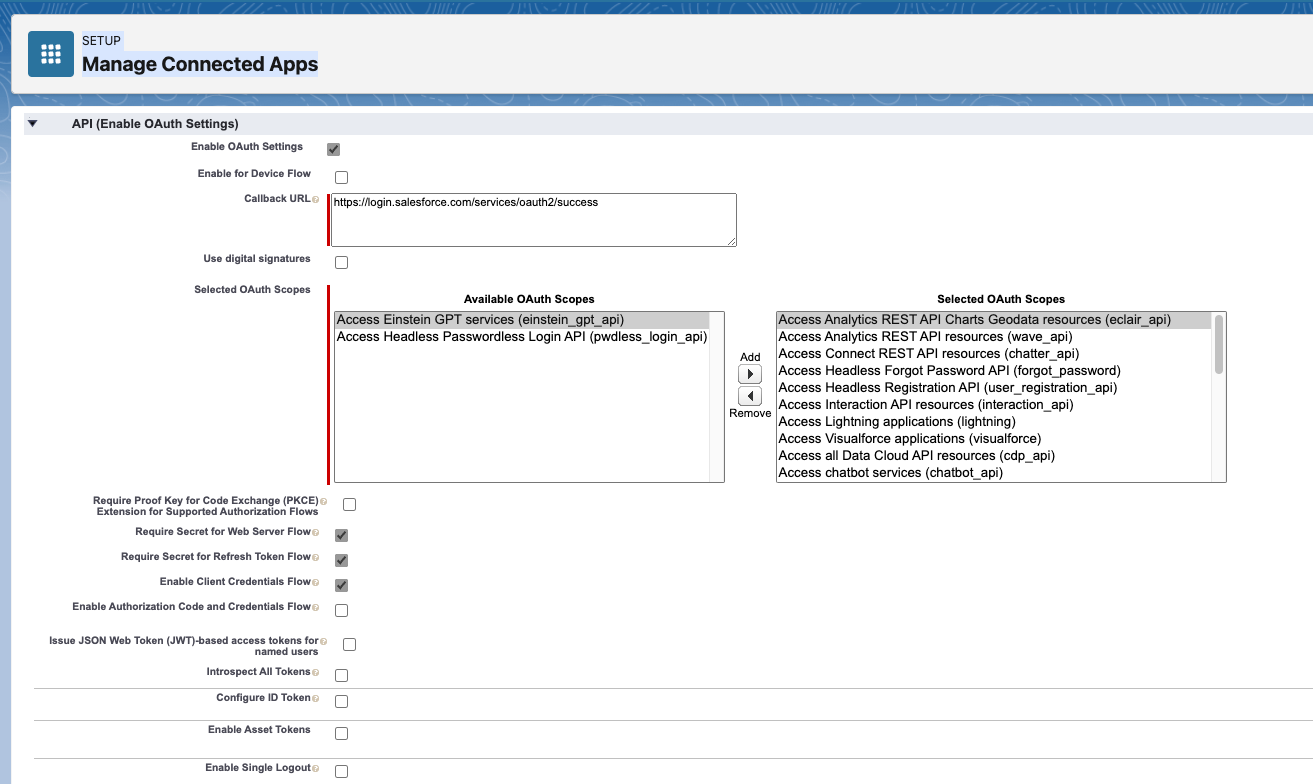
Configure your Salesforce instance for secure access by CloudTools and other external applications.
Salesforce provides a robust set of API’s that external applications can use to interact with your enterprise data. Connected apps provide a mechanism for allowing secure, controlled access to your Salesforce org within the boundaries that you define. If you are an Apptigent CloudTools customer, you will need to configure a connected app before you can begin using the service.
Step 1 – Launch the App Manager
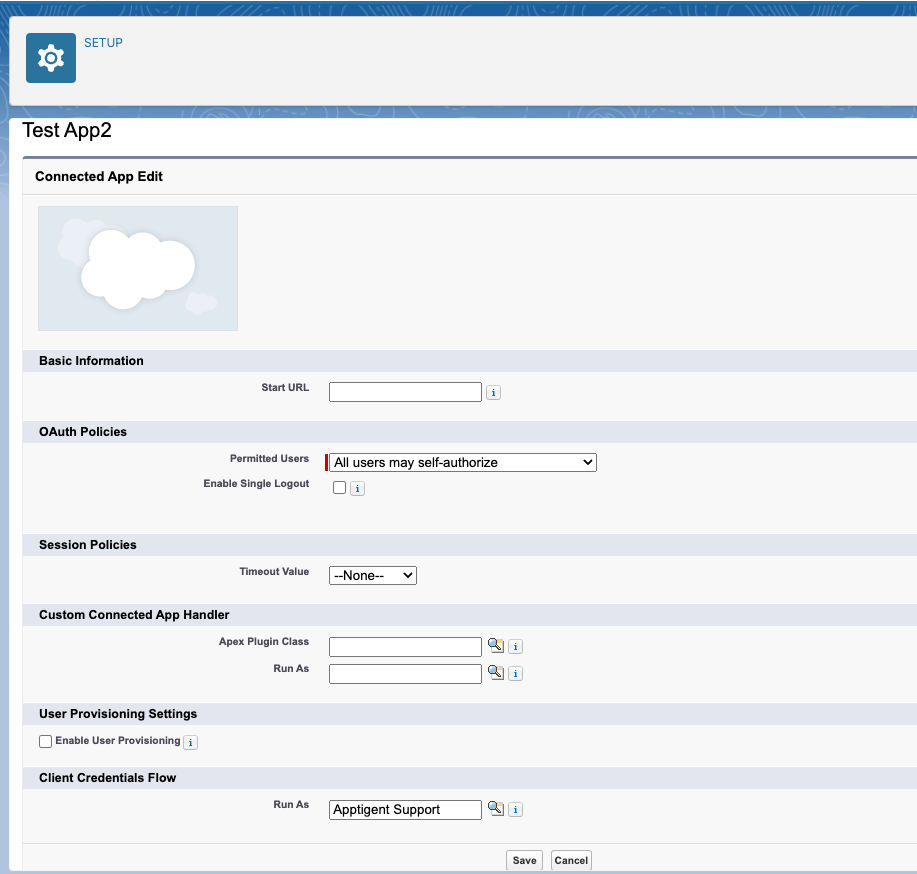
Step 2 – Create An App
Step 3 – Set App Permissions